Okay, so we know how to pick out
papers, right? Now what do ya do with them? °Ü° Shading and dimension will bring your piecings to life! I guess it is the old painter in me, but I try not to look at any of my dies as a 2-dimensional object. I am always looking to give them a little more.
Let's take this cute little chick, for instance.
{Image can be found on the new Spring Seasonal Easter cartridge}Here is the image freshly cut.

Here is the bow. You can cut 2 layers for it, which I love.
Put the cuts together and this is what you have.
A very cute little Spring Chick-A-Dee
hmmm...I think we can do better! °Ü°
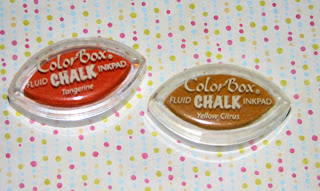
Get out your inks, (or chalks, your choice)
I use Color Box's (Cat Eye) Fluid Chalk Ink pads.
They are small, inexpensive, and really easy to work with.
Here is what I cut: 1 yellow chick, 1 orange & white polka dot chick, 1 pink patterned bow and 1 solid darker pink cardstock bow.
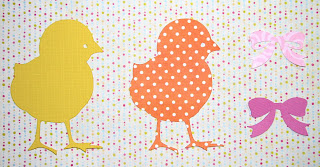
So let's start with our chicks.

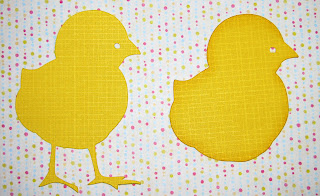
I know this sounds a little mean, but cut the legs off your yellow chick. Be sure to follow the natural line of the body, so you can't tell this is what you did. You want it to look like it was cut naturally, with the Cricut, when you are done.

Now, take your yellow inks, or chalks, and go around the edges. Don't worry about the eye. We have something else in store for that.

So now, your chick has gone from looking like the first image to the second. And we are lookin' good... movin' on...
Take your orange chick.
Again, I know it sounds mean, but cut off the beak.
Be sure to cut it at a curve. You want it to look like a real beak when you are done.
Ink or chalk around the beak and the legs. (You don't need to waste on the body, that part won't even show!)

Now, take your little yellow chick and adhere the beak over the yellow beak.
Adhere the yellow chick to the orange one.
This is what you get!
Notice, I have a little baby blue brad ready for the eye.

Now for the bow.
The chick I cut is 4" tall, so when I go to cut the bow, it automatically cuts it to the proportionate size.
I cut the first bow, the one with the ribbon holes cut out, with patterned paper at the same size as the chick.
BUT, for the darker cardstock bow, I upped the size to 4 1/4" so that it would be just a tad larger and give me a shadow effect.

Here's what it looks like layered and glued down. See how nice the darker edges look? Much nicer than if they were the same size.

For me, the bow is still missing something. We need some BLING!
By adding a simple gemstone to the center of the bow, you get a whole new look! One that has a bit of a richer feel. Love it!
But, we're still not done.
Take the bow and GENTLY, with your thumbs, bend and roll the edges up just a little bit. This is going to add a little more dimension, just a like a real ribbon bow has.
Adhere the bow to your chick and you are done!
How stinkin' cute is she? The original was cute... but this one STINKIN' CUTE! °Ü°
She has some life to her and is adorable.

If you want a more realistic look, skip the paper bow and tie a ribbon around her neck. Add a little flower for a festive look.

To add more dimension, I would use pop dots to adhere her to my card or scrapbook page. It's that easy! When you look at an image, allow your mind to see past what is there and create what you REALLY see! The possibilities are endless!
Here are a few more examples of what inking and chalking will do:
A little ink around the edges of the paper, ice cream and cone will add some life.
Okay, backing up... I love make-up! I always have! I remember being a little girl and sitting and watching my mom and my older sister do their make-up and loving every second of it. I was so excited when I got to wear it. So, what does that have to do with anything? Well...
When I create babies, kids, girls and the Princesses of Disney, I always put a little color on their faces. Blush will do a lot for an image. Eye shadow will make them striking! °Ü°
Here Snow White is with no make-up. How embarrassing. Ü

Here she is with a little blue eye shadow and some blush! Really makes those red lips of hers pop, wouldn't you say?
A little chalking to the faces will warm them right up and make them more realistic that you will ever believe!

I did the same with Ariel
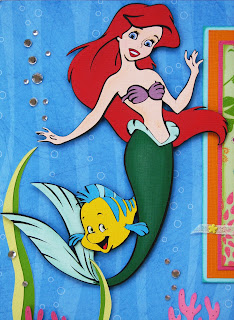

For her tail, I took some white chalk and chalked where highlights would naturally be.

For Minnie, I inked the edges of her bow and dress with red ink. For her shoes, a yellow ink.
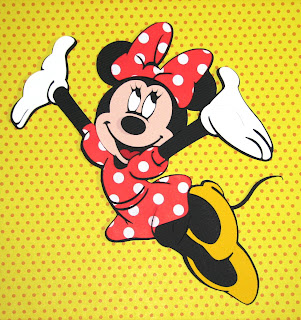
Using 3D pop dots, I popped up her bow, dress and nose. Shoes, face and eyes lay flat. The difference to using no 3D effect is huge!

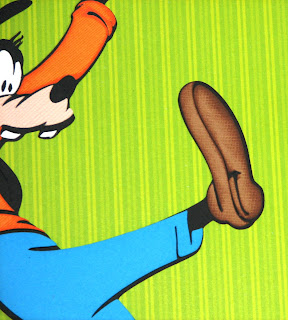
Here's Goofy, you can't tell from this angle, but he has 3d effects, too.
First, note the inking around his shirt.
and shoes
I popped up his hat, shirt and pants.
So, there you have it. Play with chalking and inking. Use 3d pop dots. You will be amazed at the results you get and your images will WOW everyone who sees them. I always get asked, "How did you do that?" Well... now you know! °Ü°


